If you haven’t seen the overview video yet, check it out:
Below, you will find the initial Setup Instructions for WP WriteShare.
Additional Setup Instructions:
- If you want to require writer’s to request writing privileges on your site, see New Writers Registration and Approval Instructions.
- Posting/Editing is very straightforward, but there are a few notes on that page.
- Show me how to quickly set up the plugin to use on an education site: Academic Setup.
- Show me how to quickly set up the plugin to use on a fanfic site: Fanfic Setup.
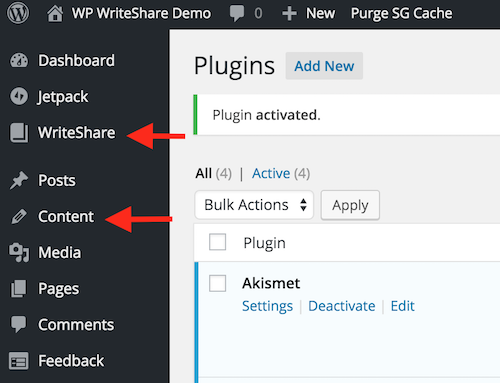
After installing and activating, you will notice TWO new items added to your Dashboard:
** WriteShare Dashboard **
The Dashboard for WriteShare has 2 sub-menus: WriteShare and Settings
After initial installation, WriteShare has nothing to display:
SETTINGS is where you will start to make the magic happen:
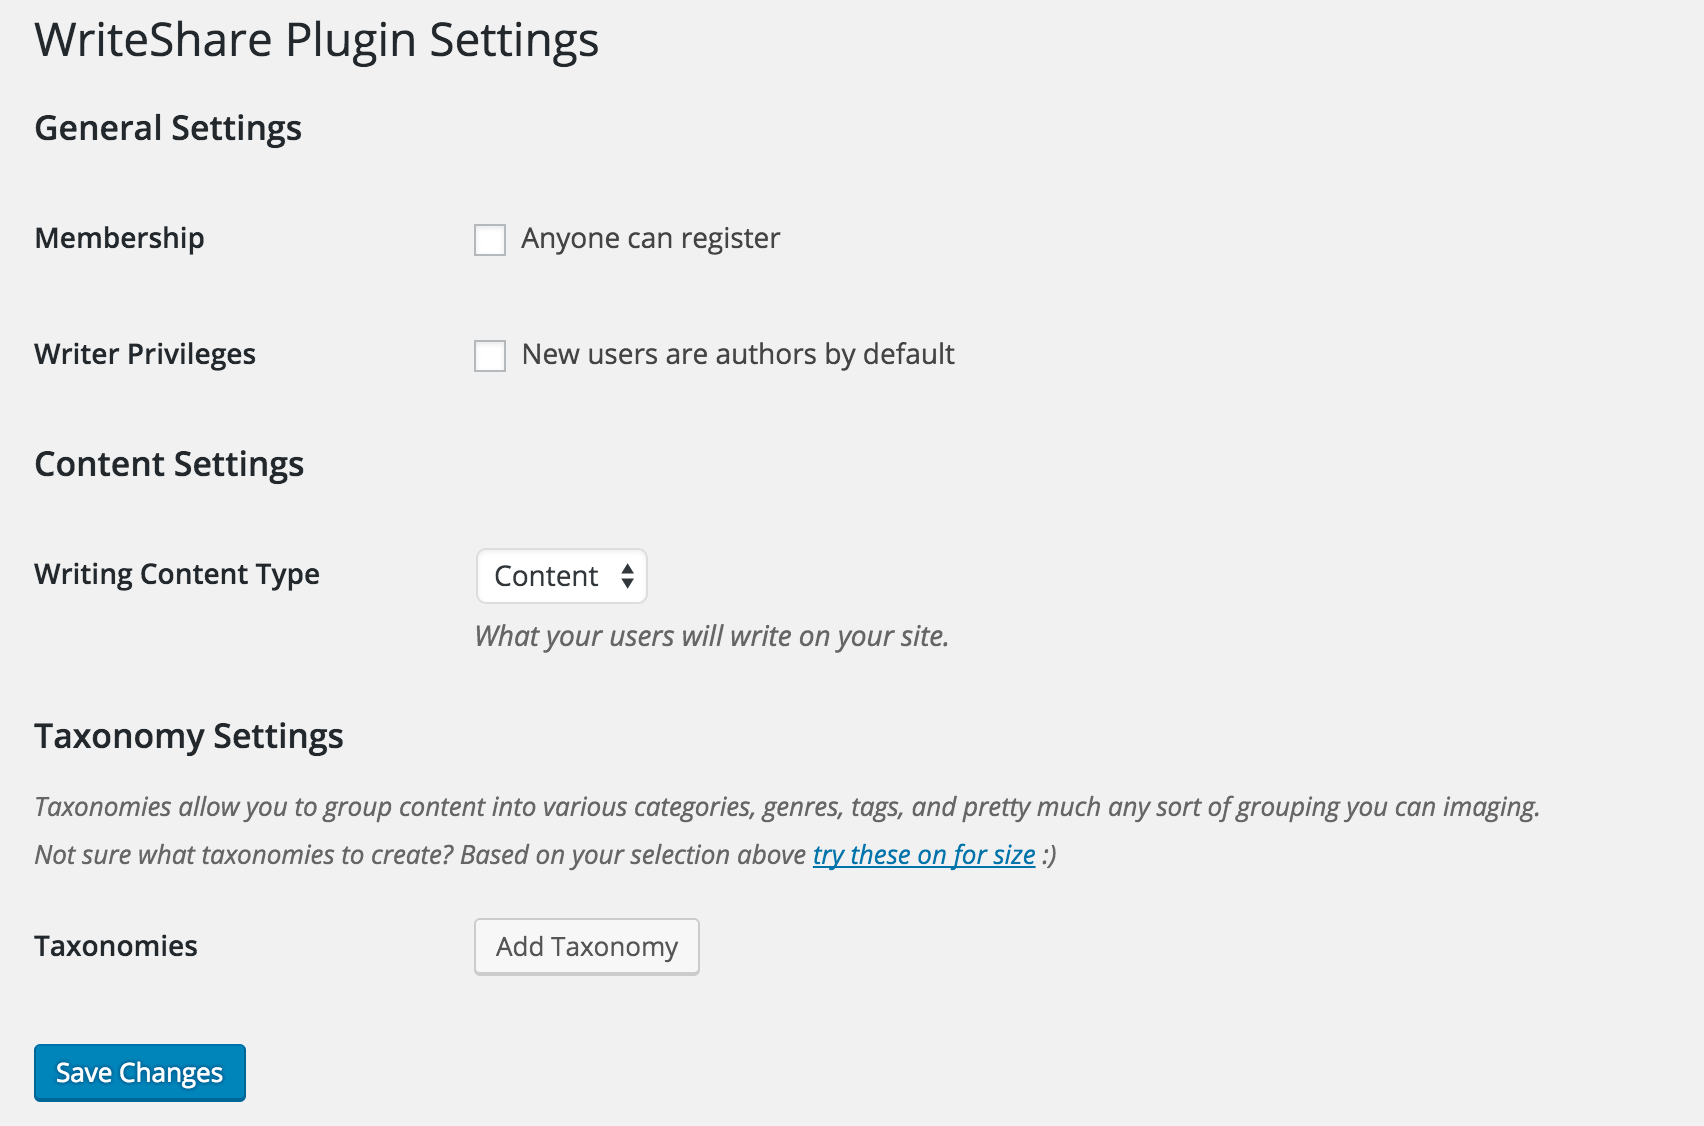
General Settings
This is pretty self-explanatory.
- Anyone can register. This gives you the option to allow an open site or closed site. If you don’t want just anyone joining your writing community, UNcheck. If you’re open to all, check it.
- Writer Privileges: New users are authors by default and will be able to submit to your archive if you check this option.
If you check this, everyone registering for your site will be able to post writings to your WP WriteShare archive.
If you UNcheck it, then each person joining your site will need to send a request that you, as Site Admin, will need to approve if you want them to have writing privileges on your site.
Content Settings
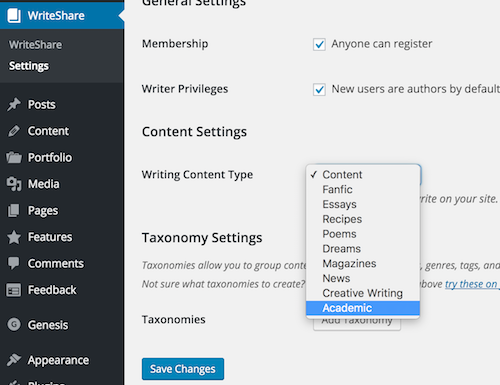
Note the drop down for CONTENT TYPE. Nothing is selected yet, which is why, in the first screenshot at the top of this page, the second Dashboard item simply says CONTENT. Once you select and save a content type, the word Content on the Dashboard will change to the content type you selected.
Note also this line: “Not sure what taxonomies to create? Based on your selection above TRY THESE ON FOR SIZE.” When you click that, we will give you several pre-filled Taxonomies. You can change them, or you can Add Taxonomy.
Explanation of options for each Taxonomy:
- ACCESS: Only admins and editors can add terms to this taxonomy – Just as it says, check this if you only want admins and editors to be able to add terms via the back end and do not want writers to be able to add terms via front end. This is a personal choice depending on how you want your site to run.
- EXCLUSIVE: Terms are exclusive to authors who create them first. If Author #1 creates “In the Heat of the Night,” no other author can use that term. See the WordPress Codex for more on Taxonomy and Terms.
- SERIAL: If this is checked, it allows authors to order content in an owned term in an arbitrary order. It only works with owned taxonomy in the settings.
- LIMIT TO [ ] term(s) per content (leave blank or 0 for unlimited) – The term limit is a limit of how many terms that can attach to the taxonomy (terms are not words, they’re phrases). So if you set limit to 3 for example in Genre they’ll only be able to attach 3 distinct genres (regardless of how many words each contains).
Of course, don’t forget to save your changes.
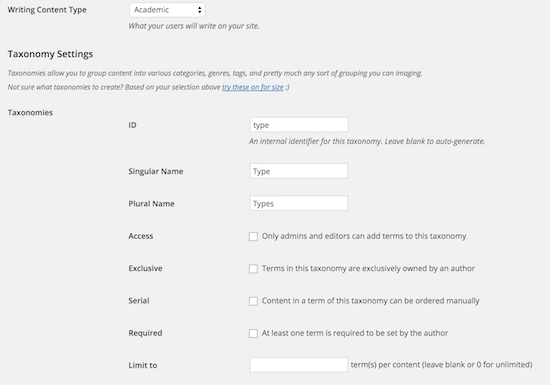
For our example here, we are going to select ACADEMIC from the drop down, and we’re going to use that TRY THESE ON FOR SIZE link. Here’s what we get:
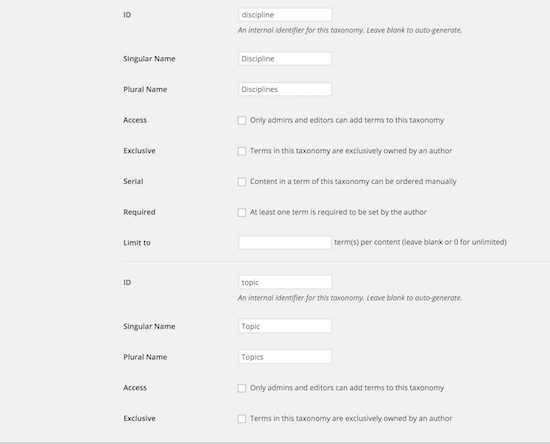
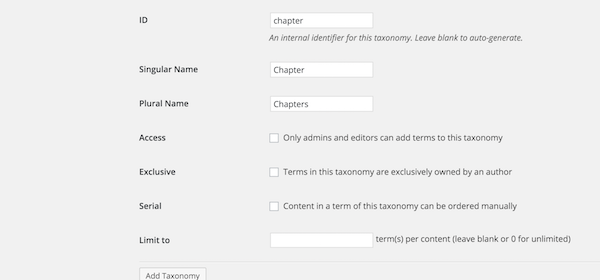
So we see there are 5 Taxonomy already established as indicated by the ID field:
- Type
- Discipline
- Topic
- Subject
As you can see, you can also add more Taxonomy if you wish.
We are going to save this as-is, making no changes or additions.
You will now see the Dashboard label CONTENT is changed to FANFIC
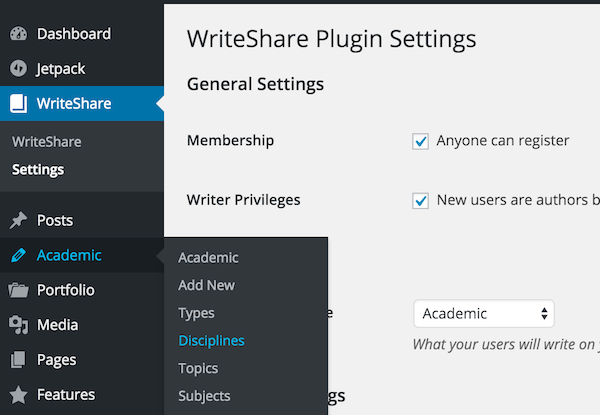
With the sub-menu items
- Types
- Discipline
- Topics
- Subjects
Here, you see those Taxonomy from the Content Settings, above. You will also see these fields on the /write/ page, from where writers will post their submissions to your site.
Had you chose Dreams or Poems or Recipes, the dashboard label would change to reflect that choice as the label.
Note: you can change your content setting at any time. However, changing the type will definitely impact SEO since you’ll get 404s for submissions prior to changing the setting.
URLS – Use these to create your Menus
NOTE: These are not pages. This is dynamically created, which is why you need the urls to create the menu.
Login/registration: /wp-admin/
Profile: /profile/
Writing: /write/
Search and Archives: /fanfic/
Editing: via Edit links in Profile; also, writers will find EDIT links on each piece of writing submitted.
